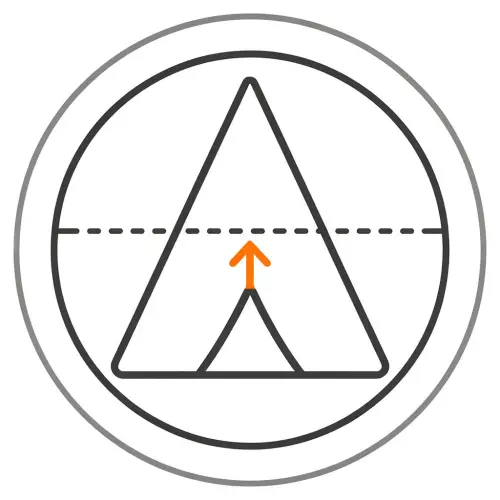
A drum-tight pitch with trekking poles comes down to three moves in a fixed order: set both poles to the peak length the shelter's spec sheet lists, stake every corner and guy point before either pole goes near the fabric, then re-tension the guylines after the poles are standing until nothing moves in a gust. A floppy shelter is almost never a bad tent or a bad pole. It's an out-of-order setup, and putting the order right takes about ninety seconds.
Come stand where I am. It's the last hour of light on a flat-enough bench above a creek, the wind is arriving in pulses instead of a steady push, and you're holding two trekking poles while I shake the shelter out of its sack. Right now it looks like an expensive pile of fabric. In ten minutes it will either hum like a snare drum or crackle and breathe all night, and the difference is entirely in the order you do things.
Get the pole length right before anything touches the dirt
Both poles get set before the first stake goes in. Pull up the shelter's specs: nearly every trekking-pole tent publishes a peak height, and most publish the pole length that produces it. Something around 45 inches (115 cm) for a compact one-person shelter, 48 inches or a little more for a two-person. Treat that number as a ceiling, not an opening bid. The panels are cut for it. Going longer doesn't tighten anything useful; it just shifts load onto the apex seam, the pole tip, and the lock, and the lock is the part that fails quietly at 2 a.m.
Reading the length is the annoying part. On a lot of poles the printed scale sits on the lower shaft, which means when the pole is inverted for the tent, the numbers face away from you or sit hidden under the sleeve. Two things help. Count sections instead of reading numbers, since most poles land within a half inch of the same spot every time, or wrap a thin band of tape on the upper shaft at your shelter's number before you leave the house. In the dark, tape you can find by feel beats a scale you can't see.
Then look at your apex and decide which way the pole goes in. A grommet or reinforced eyelet at the peak means tip up and handle on the ground. A sleeve or pocket sized to swallow the whole handle means handle up. Get this wrong and you'll be rethreading a pole by feel while the wind takes the shelter.
Two poles are not two of the same job
On a two-pole A-frame, don't set the first pole to full length and then try to insert the second. Both poles go in short, a couple of notches under final, then get raised one at a time. If the first one is already at height, the fabric comes up around it and the second apex point sits a foot away from where the pole needs to be, so you end up dragging the whole shelter sideways across ground you just staked. That drag loosens corners you already had right, and you spend the next ten minutes undoing your own work.
A single-pole pyramid is the opposite problem. That one pole carries the whole structure, so the corners have to be right first, and there's nothing to balance against if they're not. Stake the corners, walk the pole to length, then work the guylines.
Stake first, pole second, tension last
Corners first, all of them, so the floor is a defined rectangle before any vertical load shows up. Drive each stake at a shallow angle with the head leaning away from the shelter. A stake driven straight down has soil to shear before it moves; a stake angled away has to be pulled up and out of undisturbed ground, and that's a much harder pull.
Then the poles. Then the part everybody skips.
Raising the poles converts the shelter from a flat shape into a three-dimensional one, and that conversion pulls every corner inward. Guylines you set perfectly ninety seconds ago are now slack, and the shelter looks pitched while the fabric still has room to move. So go around and take it up. Do it in pairs, opposite corner then the other opposite then the sides, instead of clockwise. Tension one corner and its opposite goes slack; working around the perimeter means chasing the same slack in a circle until you give up.
What taut actually feels like
Tap a panel with two fingers. A properly tensioned panel gives a short, low thump, closer to a drum than to cloth. Slack fabric crackles, and in a gust you'll see a panel move a half inch and snap back. Door zippers are the other honest gauge. If closing a zip means hauling on the pull, the panel is loaded and the pitch is distorted, and you're about to stress a seam every time you get in and out.
Over-tensioning has a signature too, and it lives at the peak. Tight wrinkles radiating out from the apex like a star mean the fabric there, the place with the least material doing the most work, is carrying the load. You'll usually see the pole bow slightly at the same time, and a bowing pole is one that slips its lock at some point in the night. Back it off a notch until the star softens and the ridgeline stays straight.
There's a material split worth knowing here. Silicone-treated nylon relaxes and takes up water, so it needs re-tensioning after it settles and again when rain starts. Dyneema composite fabric doesn't stretch. If a DCF shelter is flapping, the problem isn't fabric relaxation, it's your staking pattern or your pole length, and no amount of guyline fiddling will fix it.
Slope, dips, and the rock under the handle
Pole length is measured along the shaft; the shelter cares about vertical height. If the base of a pole lands in a dip below the level of the corners, you need more length. If it's standing on a hump or a root, you need less. That's the whole logic.
A flat rock under the handle does two jobs: it spreads the load so the handle doesn't press a cup into soft ground, and it gives the pole something level to stand on when the ground under it isn't. Use one whenever the base of the pole lands somewhere different from where the corners landed.
What I don't do is use pole length to rescue a bad site. If the ground is uneven enough that you're running a 45-inch shelter at 52 inches to make the ridgeline straight, you're loading the apex to compensate for the terrain. Walking twenty feet to a flatter patch costs less than a strained apex seam.
When the stake won't go in
Hardpack, granite, roots, a gravel bar. Move the stake six inches first, because that solves it more often than anything else. Failing that, use the pole itself.
Drive the tip into the ground at a low angle pointing away from the shelter, then tie or clip the guyline to the shaft just below the grip. The pole presents far more surface area than a stake, and you can lean your weight onto the handle to set it. Check it again before you get in; a pole anchor under a pulsing wind can work loose in a way a stake usually won't.
The other version: lay the pole flat on the ground perpendicular to the guyline, tie the line around the shaft, and stack rocks across the shaft on both sides of the knot. The pinch under the pile is what holds, so the weight has to sit on both sides. A pile on one side just rolls the pole.
The ninety-second re-check
Fabric relaxes. A pitch that thumped like a drum at seven will have slack by nine. Take up the guylines once before you get in, and again if rain starts, because wet nylon panels sag. Not at 2 a.m. in the middle of a gust if you can help it. That's when people grab a pole and lean on it, which is how poles get bent.
Then step back and look at the ridgeline. Straight, unbroken, no star at the peak, no panel breathing in the wind, zipper moving with two fingers. That's the pitch. You'll sleep through the first gust instead of lying there listening for the flap.